
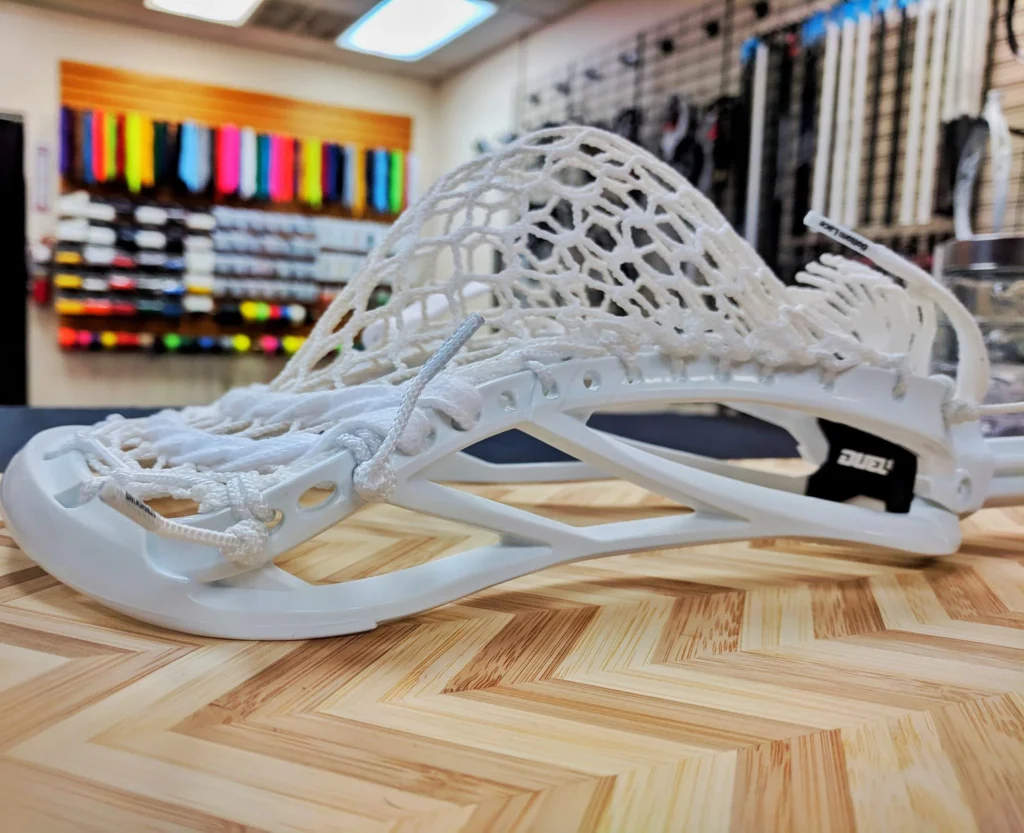
With over a decade of experience coaching elite lacrosse players, I’ve seen firsthand how a well-strung stick can transform a player’s confidence, control, and creativity on the field. Stringing isn’t just a technical skill. It’s the bridge between raw talent and refined execution. Customizing your pocket depth, shooters, and mesh tension allows you to craft a stick that aligns perfectly with your position, playstyle, and competitive goals. Below, I’ll break down the fundamentals of stringing a lacrosse stick, empowering you to build a setup that enhances your game’s strengths and sharpens your weaknesses.
Overview
Stringing a lacrosse stick involves creating the pocket where the ball sits. This pocket is made using strings and mesh. The process includes attaching the mesh to the head of the stick, creating sidewalls, and forming the shooting strings. Each part of the stringing process affects how the ball moves and how you play.
Materials Needed

To string a lacrosse stick, you’ll need several important materials. Each one plays a key role in making sure your stick performs well on the field. Let’s go through them one by one.
Traditional Lacrosse Stringing Materials
Traditional stringing materials include leather and nylon strings. These are used to create a custom pocket that can be adjusted for different playing styles. Traditional stringing is known for its durability and control. The leather strings form the main structure of the pocket, while the nylon strings are used to tie everything together and adjust the tension.
Six Diamond Lacrosse Mesh
Six diamond mesh is a type of mesh with larger holes compared to standard mesh. It’s popular because it provides a good balance between control and ease of stringing. The larger diamonds help create a deeper pocket, which can improve ball handling and shooting accuracy. This type of mesh is also easier to break in, making it a favorite among many players.
Pocket String
Pocket strings are used to form the pocket of the lacrosse stick. They help shape the pocket and determine how the ball sits in the stick. Properly strung pocket strings are crucial for good ball control and accurate passing. These strings run vertically and horizontally through the mesh, creating the desired pocket depth and shape.
Lacrosse Pocket Pounder
A lacrosse pocket pounder is a tool used to break in and shape the pocket. By pounding the pocket, you can soften the mesh and create a more defined pocket, which helps with ball retention and control. This tool is especially useful for new mesh that needs to be broken in quickly. It ensures that the pocket forms evenly and maintains its shape over time.
Sidewall Strings
Sidewall strings attach the mesh to the sides of the lacrosse head. They play a critical role in shaping the pocket and ensuring the mesh stays in place. Tight sidewall strings help create a consistent and reliable pocket. These strings run through the sidewall holes of the lacrosse head and are tied in a specific pattern to secure the mesh tightly.
Top Strings
Top strings secure the top of the mesh to the lacrosse head. They need to be tight and evenly spaced to ensure the mesh is properly aligned. Good top strings help prevent the ball from hitting the plastic of the head. These strings are threaded through the top holes of the lacrosse head and the top row of the mesh, ensuring a snug fit.
Shooting Strings
Shooting strings are placed horizontally across the top of the pocket. They help control the release of the ball when shooting or passing. Adjusting the tightness of the shooting strings can change the feel and performance of your stick. Typically, players use 2-3 shooting strings, which can be straight or in a “U” or “V” shape, to fine-tune their shot accuracy and speed.
Preparing the Mesh
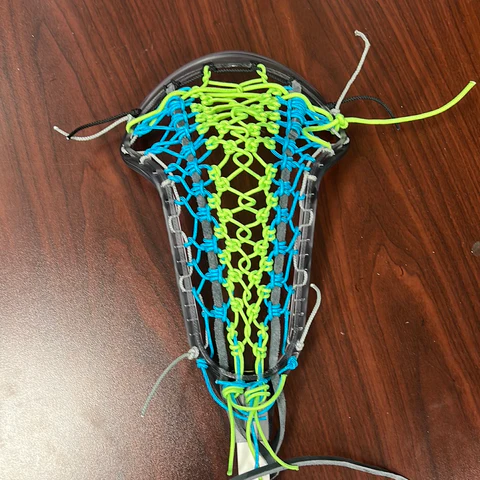
Before you start stringing your lacrosse stick, it’s important to prepare the mesh properly. One of the key steps is stretching the mesh out. This helps ensure that your pocket forms correctly and performs well during play.
Stretch Your Lacrosse Mesh Out
Stretching the mesh is crucial because it helps to loosen the fibers and make the mesh more flexible. This flexibility is important for creating a deep and consistent pocket. Here’s why stretching the mesh is so important:
- Better Pocket Formation: When the mesh is stretched, it becomes easier to shape into a pocket. This helps the pocket hold its shape and improves ball control.
- Enhanced Performance: A well-stretched mesh allows for smoother ball release and better accuracy when passing and shooting.
- Durability: Stretching the mesh helps to prevent it from shrinking or becoming too tight over time, which can affect your stick’s performance.
To stretch your mesh, simply soak it in warm water for a few minutes, then gently pull on it in all directions. Make sure to stretch it evenly to avoid any weak spots. Once the mesh is stretched and dried, you’re ready to start stringing your lacrosse stick!
Preparing the Strings
Before you start stringing your lacrosse stick, it’s important to prepare the strings properly. This ensures that the stringing process goes smoothly and that your pocket performs well. Make sure to follow the lacrosse rules for the depth of the lacrosse head with stringing your stick.
Prepare Sidewall Strings and Top String
- Measure and Cut the Strings:
- Sidewall Strings: Measure out two lengths of sidewall string, each about 2-3 feet long. This length allows enough string to securely attach the mesh to the sidewalls of the lacrosse head.
- Top String: Measure a length of top string, about 1.5-2 feet long. This will be used to attach the top of the mesh to the lacrosse head.
- Seal the Ends:
- Use a lighter to carefully melt the ends of the strings. This prevents the strings from fraying and makes them easier to thread through the holes in the lacrosse head.
- Pre-Stretch the Strings:
- Gently pull on the strings to stretch them out. This helps to remove any slack and ensures that the strings will stay tight once they are tied.
- Organize Your Strings:
- Lay out your strings in an organized manner. This makes it easier to grab the right string when you need it during the stringing process.
By preparing your sidewall strings and top string ahead of time, you’ll be ready to start stringing your lacrosse stick with confidence and precision.
Stringing the Top of the Lacrosse Head

Stringing the top of the lacrosse head is a crucial step in creating a well-performing pocket. The top string secures the mesh to the head and helps shape the pocket. Let’s explore different styles and techniques for top strings.
Lacrosse Head Top Strings
There are several styles and techniques for stringing the top of a lacrosse head. Each style affects the pocket’s performance and the ball’s release. Some common top string styles include:
- Standard Top String: This is the most basic and commonly used top string. It involves threading the string through the top row of mesh and the top holes of the lacrosse head.
- 9 Diamond Top String: This style uses the top nine diamonds of the mesh and provides a tight and secure attachment.
- Triangle Top String: This style adds an extra loop of string, creating a triangle pattern that offers additional stability and a unique look.
9 Diamond Top String
- Prepare the Mesh and Head:
- Fold the top row of the mesh over so that the top nine diamonds are doubled up.
- Align the mesh with the top holes of the lacrosse head.
- Start the Top String:
- Thread the top string through the first hole on the left side of the head and the first diamond of the mesh.
- Pull the string through and leave a small tail for tying a knot later.
- Weave Through the Mesh:
- Continue threading the string through each diamond of the mesh and the corresponding hole in the lacrosse head.
- Make sure the string is tight and the mesh is evenly spaced.
- Secure the Ends:
- Once you reach the last hole on the right side of the head, tie a knot to secure the string.
- Go back and tighten any loose sections to ensure the mesh is firmly attached.
Lacrosse Top String Styles
There are various top string styles you can use, each offering different benefits:
- Standard Top String: Simple and effective, suitable for most players.
- 9 Diamond Top String: Provides a tight and secure attachment, ideal for players who prefer a consistent pocket.
- Triangle Top String: Adds extra stability and a unique look, great for players who want a bit more flair.
- Double Top String: Uses two strings for added durability and a tighter hold on the mesh.
Experimenting with different top string styles can help you find the one that best suits your playing style and preferences.
Stringing the Sidewall

Stringing the sidewall of a lacrosse head is a crucial step in creating a well-performing pocket. Here’s a detailed guide to help you through the process.
How To String A Lacrosse Head Sidewall
- Start at the Top:
- Begin by threading the sidewall string through the top sidewall hole of the lacrosse head and the top diamond of the mesh.
- Pull the string tight and tie a knot to secure it.
- Weave Through the Mesh:
- Continue threading the string through each sidewall hole and the corresponding diamond of the mesh.
- Make sure the mesh is evenly spaced and the string is pulled tight.
- Secure the Bottom:
- Once you reach the bottom sidewall hole, tie a knot to secure the string.
- Check that the mesh is tight and evenly spaced along the sidewall.
Attach the Lacrosse Mesh to the Sidewall
- Align the Mesh:
- Align the mesh with the sidewall holes of the lacrosse head.
- Make sure the top of the mesh is securely attached to the top of the head.
- Thread the Sidewall String:
- Start threading the sidewall string through the top sidewall hole and the first diamond of the mesh.
- Pull the string tight and tie a knot to secure it.
- Continue Down the Sidewall:
- Thread the string through each sidewall hole and the corresponding diamond of the mesh.
- Make sure the mesh is evenly spaced and the string is pulled tight.
- Secure the Bottom:
- Once you reach the bottom sidewall hole, tie a knot to secure the string.
- Check that the mesh is tight and evenly spaced along the sidewall.
Tying Your First Lacrosse Sidewall Knot
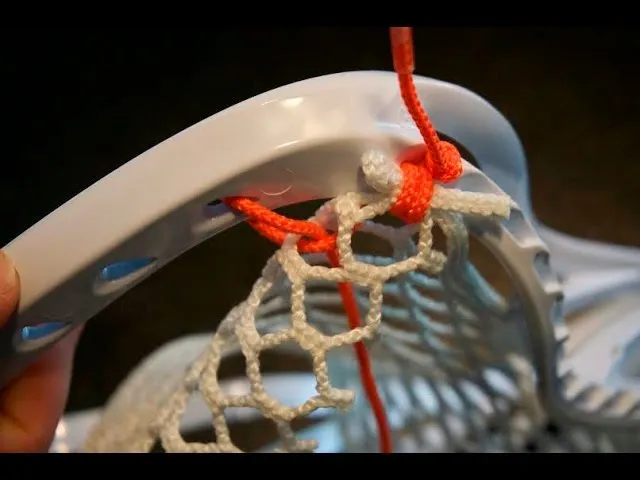
There are several knots you can use to attach the mesh to the sidewall. Here are some common ones:
First Sidewall Knot – 1:
- Single Loop Knot: This is a basic knot where you loop the string through the sidewall hole and the mesh diamond once, then tie a knot to secure it.
First Sidewall Knot – 2:
- Double Loop Knot: Similar to the single loop knot, but you loop the string through the sidewall hole and the mesh diamond twice before tying a knot. This provides extra security.
First Sidewall Knot – 3:
- Interlock Knot: This knot involves looping the string through the sidewall hole, then through the mesh diamond, and back through the sidewall hole again before tying a knot. This creates a tighter hold.
First Sidewall Knot – 4:
- Knotted Interlock: This is an advanced knot where you create an interlock knot and then tie an additional knot on top for extra security.
First Sidewall Knot – 5:
- Anchor Knot: This knot is used at the top and bottom of the sidewall to anchor the mesh securely. It involves looping the string through the sidewall hole and the mesh diamond multiple times before tying a knot.
Checkpoint: Ensuring Everything is Tight and Secure
- After tying each knot, make sure to pull the string tight to ensure the mesh is securely attached.
- Check that the mesh is evenly spaced and there are no loose sections.
- Adjust any knots as needed to ensure a consistent and reliable pocket.
Skip Two Holes and Tie Another Knotted Standard Interlock
- Skip Two Holes:
- After tying your first set of knots, skip two sidewall holes to create a tighter channel for the ball.
- Tie a Knotted Standard Interlock:
- Thread the string through the next sidewall hole and the corresponding diamond of the mesh.
- Loop the string back through the sidewall hole and tie a knot to secure it.
- This creates a tighter channel, which helps with ball control and accuracy.
By following these steps, you’ll be able to string the sidewall of your lacrosse head effectively, creating a pocket that performs well and suits your playing style.
Planning and Creating the Pocket
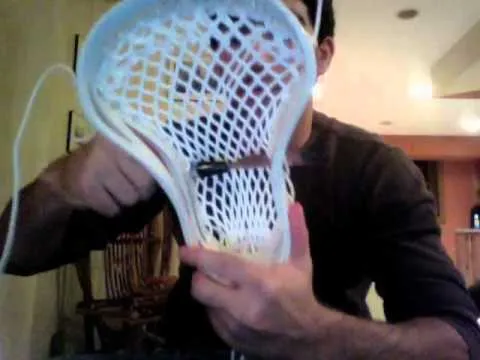
Creating a well-formed pocket is essential for optimal performance in lacrosse. Here are the steps and considerations for planning and creating your lacrosse pocket.
Planning Your Lacrosse Pocket
- Positioning:
- Decide where you want your pocket to be. Common placements are high, mid, or low, each offering different advantages. A high pocket provides quicker release, a mid pocket offers a balance of control and release, and a low pocket gives better ball retention.
- Depth:
- The depth of the pocket affects ball control and legality. Ensure the pocket is deep enough to hold the ball securely but not so deep that it becomes illegal.
- Shape:
- The shape of the pocket should be consistent and symmetrical. This helps with ball control and accuracy when passing and shooting.
Anchoring the Lacrosse Mesh Down and Creating a Tighter Channel
- Anchor the Mesh:
- Start by securing the mesh to the top of the lacrosse head. Make sure it is centered and tight.
- Create a Channel:
- Use sidewall strings to pull the mesh down tightly, creating a channel. This channel helps guide the ball and improves accuracy.
- Tighten the Sidewalls:
- Ensure the sidewall strings are tight and evenly spaced. This helps maintain the shape of the pocket and prevents the mesh from shifting.
Check Both Sides and Make Sure They’re Tight
- Symmetry:
- Regularly check both sides of the pocket to ensure they are symmetrical. This ensures consistent performance.
- Tightness:
- Make sure all strings are tight. Loose strings can cause the pocket to shift and affect ball control.
Skip One Hole and Tie a Knotted SI Again
- Skip a Hole:
- After securing the mesh, skip one sidewall hole to create a tighter channel.
- Tie a Knotted SI:
- Thread the string through the next sidewall hole and the corresponding diamond of the mesh.
- Loop the string back through the sidewall hole and tie a knot to secure it.
Tie Two Knotted SI’s Next to the Last KSI
- Tie Two Knotted SI’s:
- After the first knotted SI, tie two more knotted SI’s in the next two sidewall holes. This helps secure the mesh tightly and maintains the pocket shape.
- Final Check:
- Ensure all knots are tight and the mesh is evenly spaced. Make any necessary adjustments to maintain a consistent and reliable pocket.
Finishing the Sidewall
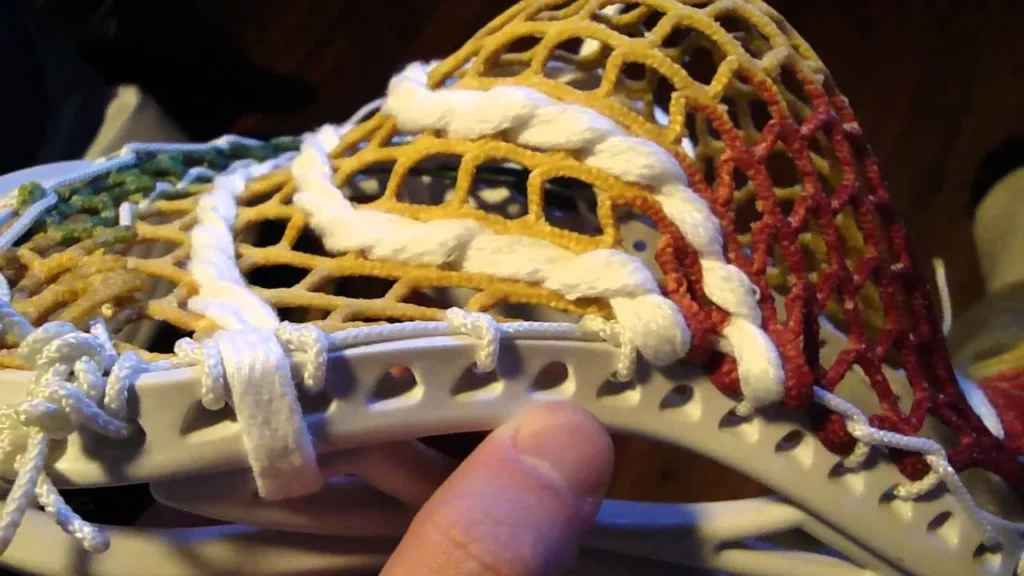
Completing the sidewall is a crucial step in ensuring your lacrosse stick performs well. Here are the final steps and tips to finish the sidewall properly.
Finishing the Sidewall: Final Steps to Complete the Sidewall
- Secure the Bottom:
- Once you reach the bottom sidewall hole, thread the string through the last diamond of the mesh and the bottom sidewall hole.
- Pull the string tight and tie a secure knot to ensure the mesh stays in place.
- Double Check the Tension:
- Go back and check the tension of each sidewall string. Make sure they are all tight and evenly spaced. This helps maintain the shape of the pocket and ensures consistent performance.
Finishing the Sidewall Continued: Additional Tips
- Burn the Ends:
- Use a lighter to carefully melt the ends of the strings. This prevents fraying and ensures the knots stay secure.
- Adjust the Pocket:
- After securing the sidewall, adjust the pocket by gently pulling on the mesh. Make sure the pocket is symmetrical and has the desired depth.
- Test the Pocket:
- Place a ball in the pocket and check how it sits. Make any necessary adjustments to the sidewall strings to ensure the pocket holds the ball securely and releases it smoothly.
Finish the Sidewall of Your Lacrosse Head: Ensuring Everything is Secure
- Final Knot Check:
- Double-check all the knots to make sure they are tight and secure. Loose knots can cause the mesh to shift and affect your stick’s performance.
- Symmetry Check:
- Ensure both sides of the pocket are symmetrical. This helps with ball control and accuracy when passing and shooting.
- Final Adjustments:
- Make any final adjustments to the sidewall strings and pocket to ensure everything is tight and secure. A well-finished sidewall contributes to a consistent and reliable pocket.
Stringing the Bottom of the Lacrosse Head
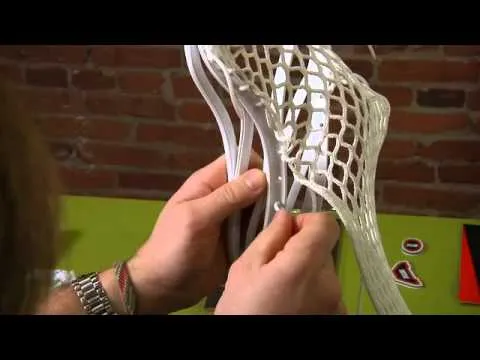
Stringing the bottom of the lacrosse head is the final step in creating a well-formed pocket. This step ensures that the pocket maintains its shape and performs well during play.
How To String A Lacrosse Stick Bottom String: Detailed Guide
- Prepare the Bottom String:
- Measure a length of string about 1.5 feet long. This will be used to secure the bottom of the mesh to the lacrosse head.
- Thread the Bottom String:
- Start by threading the string through the bottom sidewall hole on one side of the lacrosse head.
- Pull the string through and leave a small tail for tying a knot later.
- Attach the Mesh:
- Thread the string through the bottom row of diamonds in the mesh. Make sure to go through each diamond to ensure the mesh is evenly attached.
- Continue threading the string through the bottom sidewall hole on the opposite side of the lacrosse head.
- Secure the String:
- Pull the string tight to ensure the mesh is securely attached to the bottom of the lacrosse head.
- Tie a knot on each side to secure the string in place. Make sure the knots are tight to prevent the mesh from shifting.
- Adjust the Pocket:
- After securing the bottom string, adjust the pocket by gently pulling on the mesh. Make sure the pocket is symmetrical and has the desired depth.
Final Pocket View: Ensuring the Pocket is Correctly Formed
- Check the Pocket Depth:
- Place a ball in the pocket and check the depth. The pocket should be deep enough to hold the ball securely but not so deep that it becomes illegal.
- Symmetry Check:
- Ensure both sides of the pocket are symmetrical. This helps with ball control and accuracy when passing and shooting.
- Final Adjustments:
- Make any final adjustments to the bottom string and pocket to ensure everything is tight and secure. A well-formed pocket contributes to a consistent and reliable performance on the field.
Customization and Adjustments
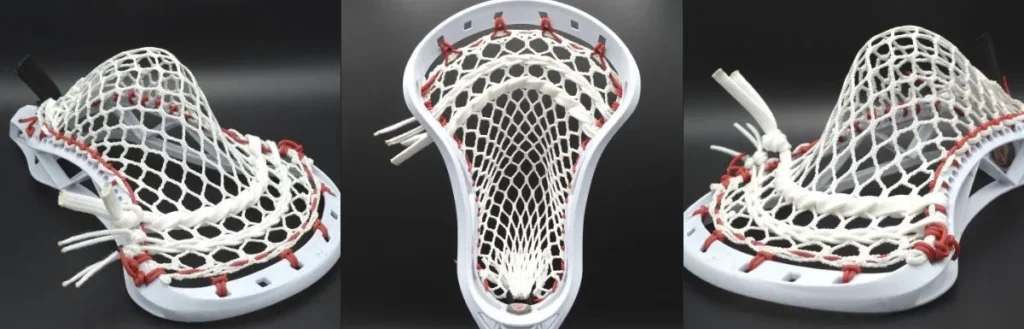
Customizing your lacrosse head can greatly enhance your performance on the field. Here are some tips and considerations for making adjustments to your stick.
How Should I String My Lacrosse Head?
- Understand Your Playing Style:
- Your playing style will influence how you string your lacrosse head. Attackers might prefer a high pocket for quick releases, while midfielders might opt for a mid pocket for versatility.
- Experiment with Different Setups:
- Don’t be afraid to try different stringing patterns and setups. Experimenting can help you find the perfect configuration that suits your needs.
- Seek Feedback:
- Ask for feedback from coaches or experienced players. They can provide valuable insights and tips to improve your stringing technique.
MESH TYPES: Overview of Different Mesh Types
- Standard Mesh:
- Standard mesh is the most common type used by players. It offers a good balance of control and ease of stringing.
- Six Diamond Mesh:
- This mesh has larger holes, providing a deeper pocket and better ball control. It’s popular among players who prefer a more defined pocket.
- Soft Mesh:
- Soft mesh is easier to break in and provides excellent ball control. However, it may require more frequent adjustments.
- Hard Mesh:
- Hard mesh is more durable and holds its shape longer. It offers a quicker release but can be harder to break in initially.
POCKET PLACEMENT
- High Pocket:
- A high pocket is positioned near the top of the head. It provides a quick release, making it ideal for attackers who need to shoot quickly.
- Mid Pocket:
- A mid pocket is positioned in the middle of the head. It offers a balance of control and release, suitable for midfielders who need versatility.
- Low Pocket:
- A low pocket is positioned near the bottom of the head. It provides excellent ball retention, making it ideal for defenders and players who need to cradle the ball securely.
THROWSTRING CONFIGURATION
- Straight Shooting Strings:
- Placing shooting strings straight across the top of the pocket can provide a smooth and consistent release. Adjust the tightness to control the ball’s release point.
- U or V Shooting Strings:
- Configuring shooting strings in a U or V shape can help channel the ball for a more accurate shot. This setup can also provide a quicker release.
- Adjusting Tightness:
- Experiment with the tightness of your shooting strings. Tighter strings can provide a quicker release, while looser strings can offer more hold and control.
Frequently Asked Questions
What do I need to string a lacrosse head?
You’ll need a lacrosse head, mesh, sidewall strings, top strings, shooting strings, a bottom string, scissors, and a lighter. A pocket pounder can also help shape the pocket.
Where to put shooting strings on lacrosse head?
Shooting strings are placed horizontally across the top of the pocket. Common configurations are straight, “U,” or “V” shapes. Typically, 2-3 shooting strings are used, starting a few rows down from the top.
How to tie a top-string lacrosse?
Fold the top row of the mesh and align it with the top holes of the head. Thread the string through each diamond of the mesh and the corresponding hole in the head, then tie a knot to secure it.
How many shooting strings are legal in lacrosse?
You can use up to four shooting strings, placed within the top four inches of the head.
What does a low pocket do in lacrosse?
A low pocket provides excellent ball retention and control, ideal for defenders and players who carry the ball often. It may result in a slower release compared to high or mid pockets.
Conclusion
Stringing a lacrosse stick involves several key steps to ensure it performs well. Start with the right materials, like six diamond mesh and various strings. Stretch the mesh and prepare the strings before beginning. String the top of the head using techniques like the 9 diamond top string. Secure the sidewalls with tight knots and ensure symmetry. Plan your pocket placement carefully and finish by stringing the bottom. Customize your stick with different mesh types, pocket placements, and shooting string configurations to suit your playing style. By following these steps, you can create a lacrosse stick that enhances your game.

 5 Best Defense Lacrosse Shafts in 2025 (Ranked and Reviewed)