
Last updated on May 26th, 2025 at 11:40 am
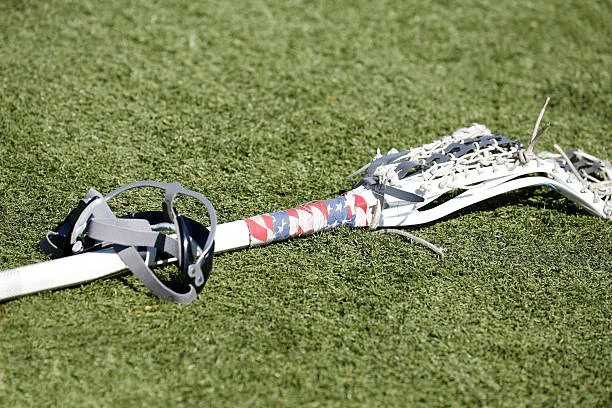
Taping your stick is super important because it helps you grip the stick better and control the ball more easily. As a professional lacrosse coach, I can tell you how to tape your lacrosse stick correctly. This guide will show you why taping is important and how to do it step by step.
Reasons to Tape a Lacrosse Stick
Taping your lacrosse stick is a smart move for any player. It offers several benefits that can improve your game and make your stick unique to you. Let’s explore why taping is so important.
Benefits of Taping
Taping your lacrosse stick provides many advantages:
- Better Grip: Tape helps your hands hold onto the stick firmly, so it doesn’t slip during play.
- Improved Control: With a good grip, you can handle the ball better, making it easier to pass, shoot, and cradle.
- Protection: Tape can protect your stick from getting damaged, helping it last longer.
Enhancing Grip and Control
One of the main reasons to tape your stick is to enhance your grip and control. When your hands can grip the stick well, you can:
- Pass Accurately: A firm grip helps you pass the ball exactly where you want it to go.
- Shoot Powerfully: Good control allows you to shoot with more power and precision.
- Cradle Smoothly: Taping helps you cradle the ball smoothly, keeping it secure in your stick.
Personalization and Style
Taping your stick isn’t just about performance; it’s also a way to show your style. You can:
- Choose Colors: Use different colors of tape to match your team or show off your favorite colors.
- Create Patterns: Make cool designs with the tape to make your stick stand out.
- Add Personal Touches: Customize your stick with your name, number, or other unique touches.
By taping your lacrosse stick, you not only improve your game but also make your stick uniquely yours.
Types of Tape for Lacrosse Sticks
When it comes to taping your lacrosse stick, choosing the right type of tape can make a big difference in your game. Here are the main types of tape you can use, each with its unique benefits.
Athletic Tape
Athletic tape is a versatile and widely used option for lacrosse sticks. It’s known for its strength and durability, which helps to provide a secure grip and protect your stick from damage. Athletic tape is available in various colors, allowing you to customize your stick to match your team colors or personal style. It’s also easy to find in most sports stores.
Hockey Tape
Hockey tape is another popular choice among lacrosse players. It has a slightly different texture compared to athletic tape, often being a bit more tacky, which can enhance your grip on the stick. Hockey tape is designed to withstand the rough conditions of ice hockey, making it very durable and long-lasting. This type of tape is also available in different colors and patterns, giving you plenty of options for personalization.
Tennis Grip Tape
Tennis grip tape is designed to provide a comfortable and tacky grip, making it a great option for lacrosse players who prefer a softer feel. This tape is usually more cushioned than athletic or hockey tape, which can help reduce hand fatigue during long games or practices. Tennis grip tape is also known for its moisture-wicking properties, which can keep your hands dry and improve your grip even in sweaty conditions.
Specialty Lacrosse Tape
Specialty lacrosse tape is specifically made for lacrosse sticks, combining the best features of athletic, hockey, and tennis grip tapes. This type of tape is designed to provide excellent grip, durability, and comfort, making it a top choice for many players. Specialty lacrosse tape often includes additional features like extra tackiness or cushioning, tailored to the needs of lacrosse players. It can be found in various colors and designs, allowing for further customization of your stick.
Popular Taping Techniques
Taping your lacrosse stick can be done in various ways, each offering different benefits. Here are some popular taping techniques, along with their descriptions, methods, and pros and cons.
The Criss Cross

Description and Method: The Criss Cross technique involves wrapping the tape in a crisscross pattern along the handle of the stick. Start at the bottom of the handle and wrap the tape diagonally up the stick, creating an “X” pattern. Once you reach the desired height, reverse the direction and wrap the tape diagonally downwards, crossing over the initial pattern.
Pros:
- Provides excellent grip due to the textured surface created by the crisscross pattern.
- Looks stylish and unique, allowing for personalization.
Cons:
- Can be time-consuming to apply correctly.
- The tape may wear out faster in high-use areas, requiring more frequent re-taping.
The Candy Cane
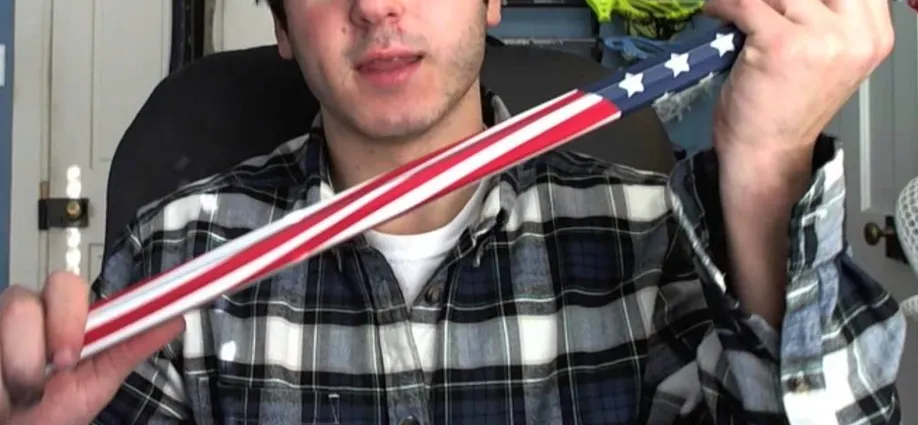
Description and Method: The Candy Cane technique involves wrapping the tape in a spiral pattern up the handle. Start at the bottom of the handle and wrap the tape around the stick in a continuous spiral, leaving small gaps between each wrap. Continue wrapping until you reach the desired height.
Pros:
- Easy and quick to apply.
- Provides a consistent grip with a textured feel.
Cons:
- May not offer as much grip as other techniques if the gaps between wraps are too large.
- Can become slippery if not wrapped tightly enough.
The Standard Wrap
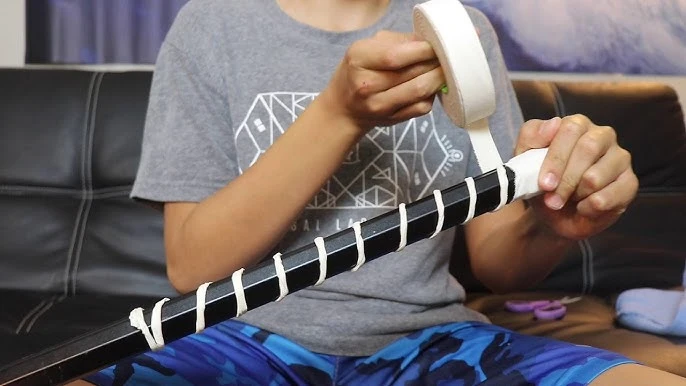
Description and Method: The Standard Wrap is a straightforward method where you wrap the tape around the handle in a straight, overlapping pattern. Start at the bottom of the handle and wrap the tape around the stick, overlapping each layer slightly to ensure full coverage.
Pros:
- Quick and easy to apply, making it ideal for beginners.
- Provides a solid and reliable grip.
Cons:
- Basic appearance without much room for personalization.
- May not offer as much texture as other techniques.
The Quarter Coverage
Description and Method: The Quarter Coverage technique involves wrapping tape around only the bottom quarter of the handle. Start at the bottom of the handle and wrap the tape up to about a quarter of the handle’s length, ensuring even coverage.
Pros:
- Saves tape and reduces weight on the stick.
- Provides grip where it’s most needed, typically where the bottom hand holds the stick.
Cons:
- Limited grip area, which may not be sufficient for all players.
- May require additional taping if more grip is needed higher up the handle.
The Half Solid
Description and Method: The Half Solid technique involves wrapping tape around the bottom half of the handle. Start at the bottom of the handle and wrap the tape up to the halfway point, ensuring even and consistent coverage.
Pros:
- Provides a good balance of grip and tape usage.
- Suitable for players who need grip in the lower half of the stick, where both hands often hold the stick.
Cons:
- May not provide enough grip for players who prefer more coverage.
- Can wear out in high-use areas, requiring re-taping.
The Mummy Wrap
Description and Method: The Mummy Wrap technique involves wrapping the entire handle in tape, similar to how a mummy is wrapped. Start at the bottom of the handle and wrap the tape around the entire handle, overlapping each layer slightly to ensure full coverage.
Pros:
- Provides maximum grip and protection for the entire handle.
- Protects the handle from wear and tear, extending the life of the stick.
Cons:
- Uses a lot of tape, which can be costly and add weight to the stick.
- Can be bulky and may affect the balance of the stick.
Step-by-Step Taping Instructions
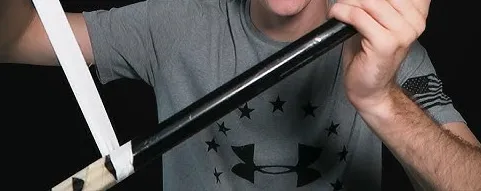
Taping your lacrosse stick properly can make a big difference in your game. Follow these detailed step-by-step instructions to ensure your stick is taped just right.
Preparation
Cleaning the Stick: Before you start taping, make sure your stick is clean. Use a damp cloth to wipe down the handle and remove any dirt, dust, or residue. This helps the tape stick better and last longer. If there is any old tape residue, you might need to use a bit of rubbing alcohol to clean it off completely.
Gathering Materials: Gather all the materials you’ll need:
- Lacrosse tape (or your preferred type of tape)
- Scissors
- A damp cloth for cleaning
- Optional: grip-enhancing spray or powder
Taping the Butt End
Creating a Knob: Start by creating a knob at the butt end of the stick. This helps prevent your hands from slipping off the end during play. To do this, wrap the tape around the bottom of the stick several times until you have a small, raised knob. Make sure the knob is firm but not too bulky, as it should fit comfortably in your hand.
Securing the End Cap: If your stick has an end cap, make sure it’s securely in place. Wrap tape around the end cap and the stick to keep it from moving. This also adds extra grip and protection. If your stick doesn’t have an end cap, you can create a makeshift one by wrapping tape around the bottom end to form a solid base.
Taping the Shaft
Applying the Chosen Technique: Choose your preferred taping technique (e.g., Criss Cross, Candy Cane, Standard Wrap) and start taping the shaft. Here’s how to apply each technique:
- Criss Cross: Begin at the bottom of the handle and wrap the tape diagonally up the stick, creating an “X” pattern. Once you reach the desired height, reverse the direction and wrap the tape diagonally downwards, crossing over the initial pattern. This technique provides a textured grip that can enhance control.
- Candy Cane: Start at the bottom of the handle and wrap the tape around the stick in a continuous spiral, leaving small gaps between each wrap. Continue wrapping until you reach the desired height. This technique is easy to apply and provides a consistent grip.
- Standard Wrap: Begin at the bottom of the handle and wrap the tape around the stick in a straight, overlapping pattern. Overlap each layer slightly to ensure full coverage. This method is quick and provides a solid grip.
Ensuring Smooth and Even Application: As you tape, make sure the tape is applied smoothly and evenly. Avoid wrinkles or bubbles, as these can affect your grip and control. If you make a mistake, simply peel back the tape and reapply it. Take your time to ensure each wrap is tight and secure.
Finishing Touches
Securing Loose Ends: Once you’ve finished taping the shaft, secure the loose end of the tape by pressing it down firmly. You can also use a small piece of tape to secure the end if needed. This prevents the tape from unraveling during play.
Checking for Comfort and Grip: Finally, check the grip and comfort of your taped stick. Hold the stick as you would during play and make sure it feels comfortable in your hands. Adjust the tape if necessary to ensure a secure and comfortable grip. If you find any areas that feel too bulky or uneven, you can trim the tape or rewrap those sections.
Taping your lacrosse stick isn’t just about personal preference—it’s a skill that evolves with your experience. Proper taping ensures a better grip during wet spring games or chilly fall tournaments, and maintaining your tape job mid-season can save you from unexpected slips.
Follow the NCAA rules and regulations on tape placement (e.g., no tape on the head’s shooting strings), so always check compliance to avoid penalties. If you are a newbie, you can check out our guide on lacrosse equipment to pair your freshly taped stick with essential gear, which covers everything from durable shafts to weather-resistant tape brands. And don’t forget—great hands mean little without solid footing. Pair your stick’s grip with the traction of lacrosse cleats to dominate ground balls and cuts.
Tips and Best Practices
Taping your lacrosse stick effectively can enhance your performance and extend the life of your stick. Here are some tips and best practices to help you get the most out of your tape job.
Effective Taping Strategies
- Choose the Right Tape: Select a tape that suits your needs, whether it’s athletic tape, hockey tape, tennis grip tape, or specialty lacrosse tape. Each type has its benefits, so pick one that provides the grip and comfort you prefer.
- Layering: When applying tape, consider layering it for added durability and grip. For example, you can start with a base layer of athletic tape and add a top layer of grip-enhancing tape.
- Tight Wraps: Ensure each wrap is tight and secure. Loose wraps can lead to slipping and reduced control. Pull the tape firmly as you wrap it around the stick.
- Overlap Slightly: Overlap each layer of tape slightly to ensure full coverage and prevent gaps. This helps create a smooth and even surface.
- Customize Your Grip: Experiment with different taping techniques to find what works best for you. Whether it’s the Criss Cross, Candy Cane, or Standard Wrap, choose a method that enhances your grip and control. Your playing position also matters, like attackers might prioritize tacky tape for quick releases, while defenders could opt for thicker wraps to withstand physical play
Avoiding Common Mistakes
- Avoid Wrinkles and Bubbles: Wrinkles and bubbles in the tape can affect your grip and control. Take your time to apply the tape smoothly and evenly.
- Don’t Over-Tape: While it’s important to have a good grip, over-taping can make the stick bulky and heavy. Use just enough tape to achieve the desired grip without adding unnecessary weight.
- Check for Comfort: After taping, hold the stick as you would during play to ensure it feels comfortable. If any areas feel too bulky or uneven, adjust the tape accordingly.
- Secure the Ends: Make sure the ends of the tape are securely pressed down to prevent them from unraveling during play. You can use a small piece of tape to secure the loose ends if needed.
Maintaining Your Tape Job
- Regular Inspections: Check your tape job regularly for signs of wear and tear. Look for areas where the tape might be peeling or losing its grip.
- Re-Tape as Needed: If you notice any issues with your tape job, don’t hesitate to re-tape those sections. Keeping your tape job in good condition ensures consistent performance.
- Clean Your Stick: Keep your stick clean to help the tape last longer. Wipe down the handle with a damp cloth after each game or practice to remove dirt and sweat.
- Store Properly: Store your stick in a cool, dry place to prevent the tape from deteriorating. Avoid leaving it in direct sunlight or extreme temperatures.
Recommended Tape Brands
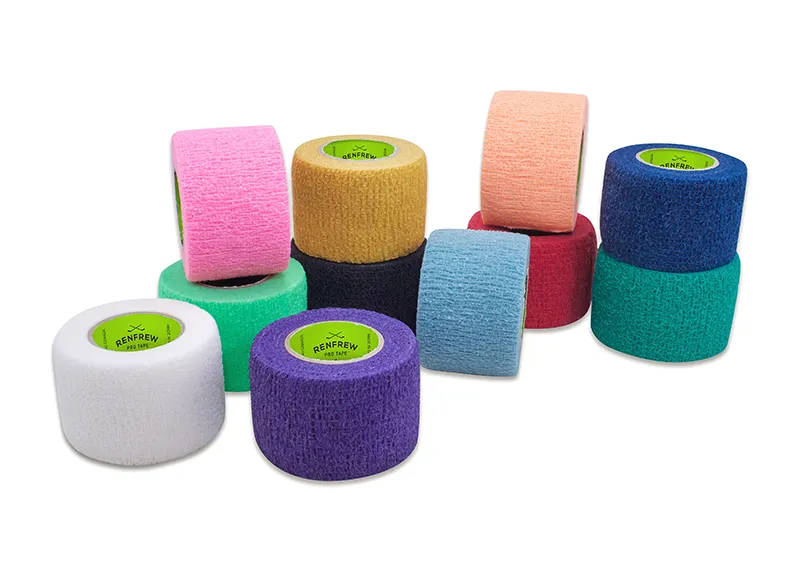
Choosing the right tape for your lacrosse stick can significantly enhance your performance. Here are some top tape brands that are highly recommended by players and coaches alike, along with detailed information about their features and benefits.
Howies Hockey Tape
Howies Hockey Tape is renowned for its high quality and durability. Originally designed for hockey sticks, this tape is also perfect for lacrosse sticks. Here are some key features:
- Strong Grip: Howies tape provides a firm grip, ensuring your hands don’t slip during play.
- Durability: It’s made to withstand tough conditions, so it won’t wear out quickly.
- Moisture Resistance: The tape is resistant to moisture, which helps it stay in place even during intense games.
- Variety of Colors and Patterns: Available in various colors and patterns, allowing you to customize your stick to match your team colors or personal style.
StringKing Lacrosse Tape
StringKing Lacrosse Tape is specifically designed for lacrosse players. It offers several advantages:
- Excellent Grip and Control: This tape enhances your ability to handle the ball with precision.
- Easy Application: It’s easy to apply, ensuring a smooth and consistent feel throughout the game.
- Durability: StringKing tape is built to last, so you won’t need to re-tape your stick frequently.
- Comfort: Provides a comfortable grip that reduces hand fatigue during long practices and games.
Spyder Grypz Pro
Spyder Grypz Pro tape is another excellent option for lacrosse players. Here’s what makes it stand out:
- Unique Texture: The tape features a unique texture that enhances grip and control, making it easier to pass, shoot, and cradle the ball.
- Comfort: Designed to be comfortable, reducing hand fatigue during extended play.
- Variety of Colors: Available in various colors, allowing you to personalize your stick.
- Shock Absorption: Helps absorb shock, reducing the impact on your hands and wrists.
Lizard Skins Grip Tape
Lizard Skins Grip Tape is popular among athletes in various sports, including lacrosse. It offers several benefits:
- Soft, Cushioned Grip: Provides a soft, cushioned grip that is both comfortable and effective.
- Shock Absorption: Designed to absorb shock, reducing the impact on your hands and wrists.
- Variety of Thicknesses and Colors: Available in different thicknesses and colors, you can choose the one that best suits your needs and style.
- Durability: Made to last, ensuring your grip remains consistent throughout the season.
Frequently Asked Questions
How to properly tape a lacrosse stick?
To properly tape a lacrosse stick, start by cleaning the handle to remove any dirt or residue, then gather your materials, including lacrosse tape and scissors. Create a knob at the butt end by wrapping the tape several times, secure the end cap if your stick has one, and choose your preferred taping technique, such as the Criss Cross, Candy Cane, or Standard Wrap. Apply the tape tightly and evenly, then secure the loose end and check for comfort and grip.
How do you hold a right-handed lacrosse stick?
To hold a right-handed lacrosse stick, place your right hand near the top of the stick just below the head, with your thumb pointing up the shaft and fingers wrapped around it, and your left hand near the bottom, providing power and stability.
How should I string my lacrosse stick?
When stringing your lacrosse stick, start by choosing your mesh type, attach it to the top of the head with top string knots, string the sidewalls to shape the pocket, secure the bottom string, and add shooting strings to control the ball’s release.
How to make a lacrosse stick not sticky?
If your lacrosse stick feels sticky, clean the handle with a damp cloth, use grip enhancers sparingly, re-tape the stick if necessary, and avoid excessive moisture by storing it in a cool, dry place.
Conclusion
Taping your lacrosse stick is crucial for enhancing grip and control, and personalizing your stick. This guide covers the importance of taping, different types of tape like athletic, hockey, tennis grip, and specialty lacrosse tape, and popular taping techniques such as the Criss Cross, Candy Cane, and Standard Wrap. It provides step-by-step instructions for preparing your stick, taping the butt end and shaft, and finishing touches. Tips for effective taping, avoiding common mistakes, and maintaining your tape job are included.

 Best Lacrosse Heads by Position 2025